CoreELEC build-system
The CoreELEC “build-system” simplifies the complex task of cross-compiling hundreds of inter-dependent source packages into a working CoreELEC image with a few simple commands.
Requirements
- Ubuntu 24.04.3 LTS. It is possible to use other Linux distrutions but this is the distribution recommended and used by Team CoreELEC (this applies for CoreELEC 22, older CE versions needs older Ubuntu versions)
- 50GB free disk space
- Active Internet Connection
- Time, a build can take several hours
Preparation
Prior to building CoreELEC, ensure the build environment is up to date
- Update Ubuntu
sudo apt update
The build-essential meta-package contains everything required for compiling basic software written in C and C++, while the git tool is needed to obtain the CoreELEC sources.
- Install build-essenstials and git
sudo apt install build-essential git python3
For those who don't want to install build-essentials or preserve space, the bare minimum tools required for building CoreELEC are: make, gcc and git
sudo apt install make gcc git python3
Obtaining the Sources
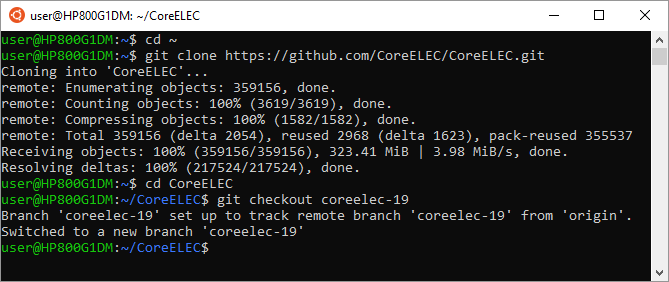
From a terminal, use the git command to obtain the CoreELEC sources from Github. This requires about 350 MB of free space.
- ensure being in the user home folder
cd ~
- to clone the CoreELEC sources type
git clone https://github.com/CoreELEC/CoreELEC.git
- to access the CoreELEC folder type
cd CoreELEC
Switching between versions
The git checkout command is used to switch between branches in a repository.
It checks the branches and updates the files in the working directory to match the version already available in that branch.
Selecting CoreELEC 19.x -ng
Ensure to be in the CoreELEC folder.
- enter the latest build
git checkout coreelec-19
To switch to an older build, specify the build tag eq: git checkout 19.2-Matrix_rc2
Building CoreELEC 19.x -ng
- create .tar update file
make
- create image file
make image
The build file will be located in ~/CoreELEC/target/
NOTE: The above steps can also be used to select (and build) CoreELEC 20 by replacing coreelec-19 with coreelec-20.
For coreelec-20 there are two devices. Default one is amlogic-ne (new era with Linux 5.4). To build Amlogic-ng DEVICE=Amlogic-ng must be used like
DEVICE=Amlogic-ng make
Selecting CoreELEC 9.2.x Legacy
Ensure to be in the CoreELEC folder.
- enter the latest build
git checkout coreelec-9.2
To switch to an older build, specify the build tag eq: git checkout 9.2.5
Building CoreELEC 9.2.x Legacy
- create .tar update file
PROJECT=Amlogic-ng make
or
PROJECT=Amlogic make
- create image file
PROJECT=Amlogic-ng make image
or
PROJECT=Amlogic make image
The build file will be located in ~/CoreELEC/target/
Building addons
To build the corresponding addons
Ensure to be in the CoreELEC folder
- enter
./scripts/create_addon addon_name
The build file(s) will be located in ~/CoreELEC/target/addons/
Removing the sources
- ensure being in the user home folder
cd ~
- to remove the CoreELEC files enter
rm -rf CoreELEC
Building with docker
To build CoreELEC in a docker container, please follow these instructions.
WSL2 PATH variable
WSL2 users should be aware the PATH environment variable needs to be set manually.
By default, WSL includes Windows path names the PATH variable. This can cause the CoreELEC build to fail. To prevent this from happening, 2 solutions are available:
Temporary solution
Prior to starting the build enter:
export PATH=/usr/local/sbin:/usr/local/bin:/usr/sbin:/usr/bin:/sbin:/bin:/usr/games:/usr/local/games:/usr/lib/wsl/lib
Permanent solution
Create an advanced configuration settings file called wsl.conf with following content:
# Setting this key to 'True', or removing this entry, will add Windows path elements to the $PATH environment variable.
[interop]
appendWindowsPath=False
save the file to the \etc folder of the Ubuntu VM
eq: \\wsl$\Ubuntu\etc
exit WSL & wait at least 8 seconds before relaunching.
More information can be found here
Support
WSL is maintained by and supported by Team Microsoft.

