Option C: Shared USB Storage
Booting from Petitboot allows the Odroid N2(+) to be used as a memory card reader.
Requirements
- Type A to Micro B USB Data Cable
- USB keyboard
- Personal Computer
- Petitboot
Preparation
- Ensure the SBC is powered OFF
- Ensure boot select switch is set to SPI
- Attach eMMC module
- Connect a USB keyboard
- Power SBC ON
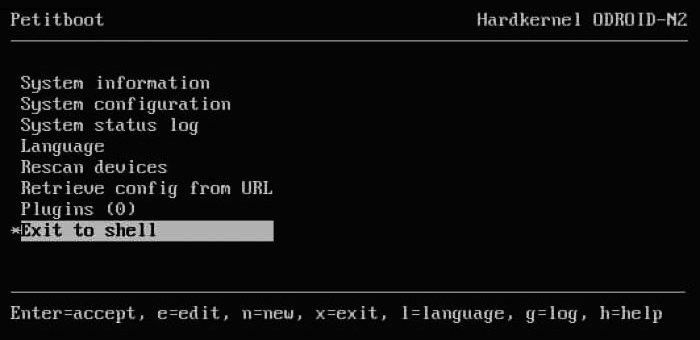
Petitboot menu
- Select
Exit to shell - Insert the USB Data Cable into an available USB port on the PC, and the SBC's OTG port
To share the eMMC module as USB Storage enter this command in the PB shell:
ums /dev/mmcblk0
- Wait for the PC to detect the eMMC
- Write the CoreELEC image for Odroid N2 to USB mounted eMMC
Once the image is successfully written, turn off USB sharing.
- Enter the following command in the PB shell:
ums
- Remove USB Data Cable
- Reboot the SBC
The next part still has to be verified.
Method #3 A new install using using SSH.
Note: this uses the current stable build as an example. But would work for any other build just by changing the URL in the command below.
Step #1: Enable SSH if you have not done so already.
go to Settings > CoreELEC > Services > SSH > Enable SSH
Step #2: Power off your Odroid N2.
Step #3: Toggle the boot mode switch to the SPI boot position.
Step #4: Attach eMMC module. (make sure the sd card that has CoreELEC installed on it is also inserted.)
Step #5: Power on your Odroid N2.
Step #6: Select CoreELEC from the Petitboot menu.
Step #6: SSH into your Odroid N2. (The default user and passwords for CoreELEC user: root password: coreelec)
Step #7: enter the following commands.
wget https://github.com/CoreELEC/CoreELEC/releases/download/9.2.1/CoreELEC-Amlogic-ng.arm-9.2.1-Odroid_N2.img.gz -O /storage/CoreELEC.img.gz
gunzip /storage/CoreELEC.img.gz
dd if=/storage/CoreELEC.img of=/dev/mmcblk0 bs=1M conv=fsync
sync
reboot
